Boat builders will use any space available for building their dream. Our situation is no different. Our cabinet shop is the lower floor of the right hand building, with our house over it. The white roll up door to the left is a large two car garage. The two man doors in the middle lead directly into the "boat barn". It runs down the far side of the cabinet shop toward the right, and the bow laps left into the garage. We are hoping that during removal of the hull this spring, for the "big roll", we will not need to remove the wall between the left man door and the garage door.

The anxiously awaited Mahogany (Sapele) arrived from Specialty Forest Products, and was loaded into the shop to wait for the veneering to begin. Mahogany is harder than cedar and Richard chose it to provide a harder substrate for directly beneath the xynole fabric/epoxy sheathing. The smooth xynole fabric sheathing is opaque so the hull will ultimately resemble a slick fiberglass finish, probably white.

Absolutely beautiful clear lumber. It was 4/4 material, re-sawn and sanded to a uniform 1/8" thickness. The 6" widths were ordered in various lengths as calculated by Richard to give optimum usage with no end seams.

Richard's friend and "technical advisor", classic boat restorer, and trained wooden boat builder, Jon Derry, stopped by for a look-see prior to the beginning of the veneering process. He highly recommended doing a very thorough job of fairing the hull at this point.

Many hours were spent getting an absolutely perfectly smooth surface without high and low spots using a long board (hand sanding).

Jon and Richard felt that smoothing and filling the soft cedar of the hull was preferable to having to aggressively sand the harder mahogany.

Finally the veneering process started. It was another learning curve, to establish the most efficient way to apply the thin strips across the hull.

In order to maintain an approximately 45 degree angle of the strips across the shapely hull, the strips must be tapered at regular intervals. A whole lot of scribing going on...

In order to maintain an approximately 45 degree angle of the strips across the shapely hull, the strips must be tapered at regular intervals. A whole lot of scribing going on...

Long practice as a wood worker helped to speed up the fitting process. Each piece was temporarily stapled to the hull about an inch away, marked by using a spacer block to scribe, removed, cut and reapplied. Then the next piece repeated the process. Richard managed to fit all the pieces for an entire hull side in a single long day.


As seen above, all the pieces were numbered and marked to show the correct vertical placement to assist in the replacement after epoxy application.

The slight taper of the pieces can be seen toward the top of this picture of the starboard section. Only enough of the less expensive metal staples to hold the piece against the curve of the hull for the next scribe were used at this point. All metal staples need to be removed prior to the epoxy being applied to each strip.


Richard removed several rows of the labeled veneer to start the final application process in the middle of the hull. The masking tape along the edge was used to protect the edge of the fitted veneer from slopping epoxy on to it. That extra step was soon determined to be unnecessary.


Above shows the midsection completed during the perfecting of the application process.
Here are some of the tools used, and the description of Richard's laying up process.


A mixture of fast and slow was used to create a moderately slow curing epoxy. This worked best for this process.

Wood flour (in the bag) is used to thicken the epoxy for certain purposes. Note the high tech epoxy heating system. Starting with consistently warm epoxy can be kind of a challenge in winter, especially if heating the entire shop area generates an $800/month propane bill.

Wood flour (in the bag) is used to thicken the epoxy for certain purposes. Note the high tech epoxy heating system. Starting with consistently warm epoxy can be kind of a challenge in winter, especially if heating the entire shop area generates an $800/month propane bill.
Ouch.

Costco has 12 oz wax free paper cups that work perfectly to mix each small batch of epoxy. Each batch must be mixed thoroughly but quickly in the cup, and then poured into a flat container to slow down the curing process. If the epoxy stays in the cup too long, it generates its own heat and sets up quickly. By exposing it to the air in a flat container the open window is increased.

Richard used two disposable plastic paint roller pans for application by foam roller. Plastic containers can be reused. After the epoxy dries, it is easily removed, and the container is ready again.

Back to the "no metal to rust or rot to be left in the hull" problem. An Omer stapler that shoots 19 gauge staples was chosen to keep the thin veneer pressed tight against the hull while drying. Richard used 3/8" long with 1/2" crown (the width) staples from Raptor Nails.
Richard contacted the Raptor Nail people and after discussion of his purpose and needs, and his concerns about the depth of the set of the crown, they agreed to take back the stapler if it didn't meet his needs. Of course, there was no need to return it. There are several options for maintaining the pressure on the veneer at this stage. One technique is to use much less expensive standard metal staples and remove all of them after the epoxy has cured. Some people shoot them over plastic strapping so that they can be removed with a yank of the strapping. One draw back to this would be the need to consistently straddle the strap. Others have used vacuum bag techniques. Getting the suction to apply easily across the large area of the curved hull, as a one man operation didn't seem too feasible. By using the plastic staples, the crown can be sanded off after the curing process, and the legs of the staples can remain in the hull. The trade off between time and cost, and the cost of your time becomes apparent. For the two layers of veneer on this 30 foot hull we have ultimately gone through about $1200. worth of staples. About 1/3 of each hull side could be done in a day, by Richard alone. He has wrapped the gun in tape in an attempt to keep it somewhat clean. Epoxy gets everywhere!

A thin layer of epoxy is rolled or brushed onto the hull where the strip is to be applied tight to it's neighbor. This wets the hull. Then a second layer of epoxy that is thickened with wood flour to the consistency of frosting is applied to help fill any voids between the strip planks or under the veneer.

The underside of the strip is wetted with thin epoxy.


A few staples hold it in the marked location, then the stapling really begins. Pow, pow, pow.
At the beginning of the stapling, the gun kept jamming and about every other staple was a misfire. This was finally resolved by using sand paper on a block to widen out the channel for the staples ever so slightly. They were just a hair tight.


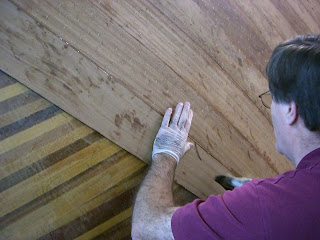
Then a cloth wet with denatured alcohol or acetone was used to remove any excess epoxy squeezed up between strips. Easier to clean it now, than to sand it later.

Sometimes a disposable bristle brush became the applicator of choice.

The strips were scribed for the port side during downtime, such as waiting for more staples or epoxy to arrive.

The remaining small section of the bow could be epoxied all in one step since the short pieces were easier to handle in the time allotted.
Pow, pow, pow...the pneumatic stapler is getting a real work out.


Pow, pow, pow...the pneumatic stapler is getting a real work out.

Working both ways on the hull, the process seemed slow for one person.

The scribed strips created many interesting patterns and visual effects.

Then he started on the port side. For a couple of days he had the help of his good friend Randy. That really sped up the process.


Then he started on the port side. For a couple of days he had the help of his good friend Randy. That really sped up the process.

The boat was pushed tight up against the wall on the completed starboard side to allow access to the port side. The boat is very rigid by this time and there is no risk of twisting the hull while moving the strongback around the shop on it's wheels.


We purchased a box of these sperm suits, and tore several during sanding procedures. They seem to hold up better during epoxy sessions, and can be used for a few weeks. 

He isn't totally sick of this process, yet...


No comments:
Post a Comment